
Choosing the right paint for your home involves more than selecting a color. Interior and exterior painting require different paint formulas, preparation methods, and application techniques. Understanding the differences between interior painting and exterior painting helps homeowners achieve a smooth finish, improve durability, and avoid common painting mistakes.
Interior paint is designed primarily for indoor surfaces, where appearance, easy cleaning, and indoor air quality matter. Exterior paint is formulated to withstand sunlight, rain, temperature changes, and moisture. Although both types of paint improve the appearance of a home, they are not interchangeable in every situation.
Before starting a painting project, it is important to understand how each paint works, how to prepare the surface, and which products are appropriate for your specific needs.
Interior Painting vs Exterior Painting: What Is the Difference?
The main difference between interior and exterior painting is the environment each coating must handle. Interior paint needs to perform well in enclosed spaces, while exterior paint must protect surfaces exposed to changing weather conditions.
Here are the key differences homeowners should understand.
1. Paint Formulation and Durability
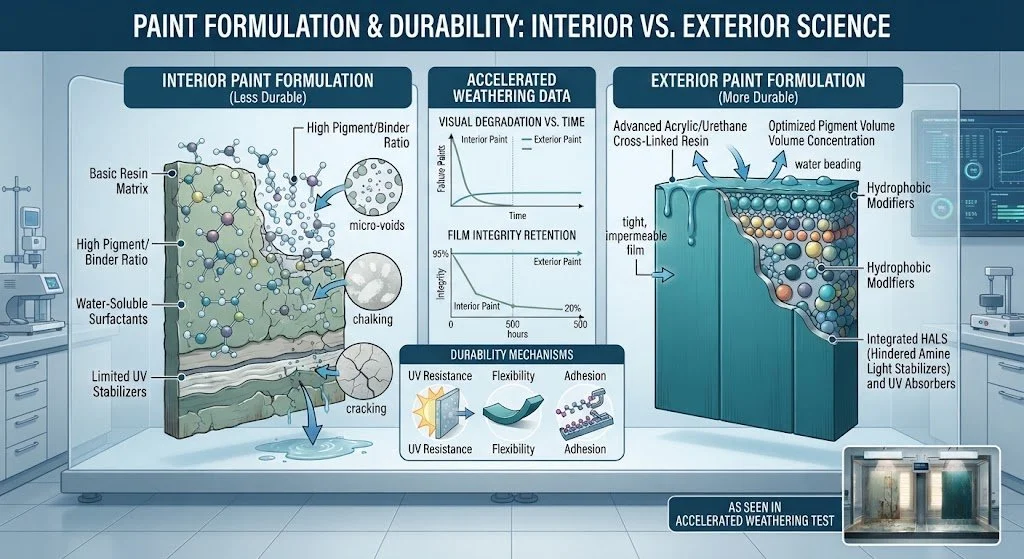
Interior paint is designed for walls, ceilings, doors, and other indoor surfaces. Many interior paints offer a smooth finish, good stain resistance, and easy cleaning. Some formulations are also designed to resist scuffs, making them suitable for busy areas such as hallways, kitchens, and children's rooms.
Exterior paint must withstand ultraviolet radiation, rain, humidity, and temperature fluctuations. It typically contains ingredients designed to improve weather resistance and maintain color and adhesion outdoors.
Using interior paint on an exterior wall can lead to premature fading, peeling, or deterioration. Similarly, exterior paint should not automatically be used indoors because it may have different emissions, application characteristics, and indoor-use suitability. Always follow the manufacturer's label.
2. Resistance to Weather and Moisture
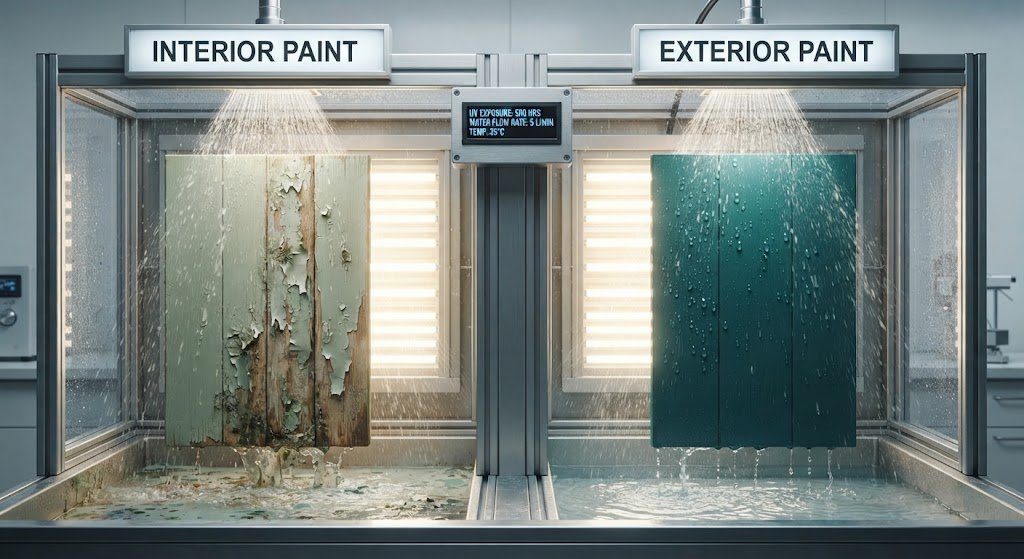
Interior walls are generally protected from direct rain and sunlight. However, bathrooms, kitchens, and laundry rooms may experience high humidity, condensation, and frequent cleaning.
Exterior surfaces face more demanding conditions. Rain, wind, direct sunlight, and repeated expansion and contraction can weaken an unsuitable coating over time.
Exterior paint is formulated to handle these environmental stresses. Interior paint is designed for indoor conditions, with specific products available for rooms where moisture resistance is important.
3. Finish and Appearance
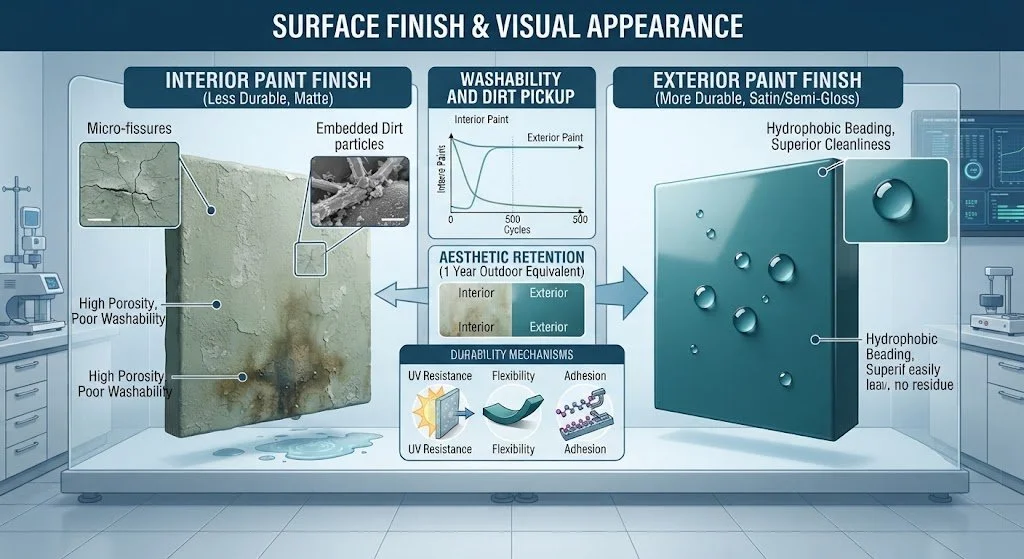
Interior paints are available in several finishes, including flat, matte, eggshell, satin, semi-gloss, and gloss. Flat finishes can help minimize the appearance of small surface imperfections, while satin and semi-gloss finishes are often easier to clean.
Exterior paints also come in different finishes, but durability and weather performance are major considerations. The appropriate finish depends on the siding material, architectural style, and manufacturer's recommendations.
For both projects, choosing the right finish can improve the final appearance and simplify maintenance.
4. Drying Time and Application Conditions
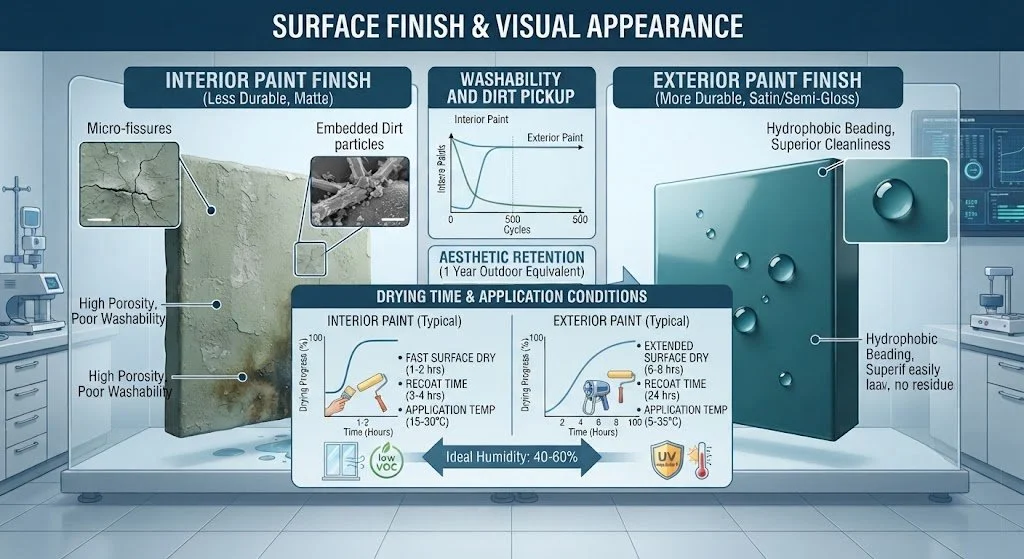
Interior painting can usually be completed under controlled indoor conditions. Temperature, ventilation, and humidity still affect drying and curing, but the work is less exposed to unpredictable weather.
Exterior painting depends heavily on outdoor conditions. Rain, dew, extreme heat, strong sunlight, and low temperatures can affect paint application and adhesion.
Always check the product's recommended temperature range, humidity limits, and drying times before starting. Paint may feel dry to the touch before it has fully cured.
Preparation Steps for Interior Painting
Proper preparation helps interior paint adhere evenly and creates a professional-looking finish. Skipping these steps can leave visible marks, uneven coverage, or peeling paint.
Step 1: Clear and Protect the Room
Move furniture away from the walls or remove it from the room. Cover floors and remaining furniture with drop cloths. Use painter's tape to protect trim, switches, outlets, and other areas that should not receive paint.
Turn off power before removing electrical cover plates, and keep paint away from electrical components.
Step 2: Clean the Walls and Surfaces
Remove dust, grease, fingerprints, and other buildup before painting. Kitchens may need more thorough cleaning because grease can interfere with paint adhesion.
Use a suitable cleaning product and allow the surface to dry completely. Avoid painting over mold or persistent moisture problems; identify and address the underlying cause first.
Step 3: Repair Imperfections
Fill small nail holes and minor cracks with an appropriate patching compound. Once dry, sand the repaired areas smooth and remove the resulting dust.
For larger cracks, damaged drywall, or recurring stains, additional repairs or specialized primers may be necessary.
Step 4: Apply Primer When Needed
Primer helps create a consistent surface and can improve adhesion. It is particularly useful on bare drywall, repaired areas, certain stains, and surfaces with a significant color change.
Choose a primer compatible with the surface and finish paint. Some modern paints include primer-like properties, but they may not replace a dedicated primer in every situation.
Preparation Steps for Exterior Painting
Exterior painting requires careful inspection because the paint must adhere to surfaces that face changing weather conditions.
Step 1: Inspect the Exterior
Check siding, trim, doors, window frames, and other painted surfaces for peeling paint, cracks, damaged wood, rust, or signs of water intrusion.
Repair damaged materials before painting. Painting over rot or unresolved moisture problems will not correct the underlying issue.
Step 2: Clean the Surface Thoroughly
Remove dirt, dust, mildew, and loose debris using a cleaning method appropriate for the exterior material. Allow the surface to dry completely before applying paint.
If using a pressure washer, choose a suitable pressure and technique to avoid damaging siding, forcing water behind boards, or stripping sound paint.
Step 3: Remove Loose Paint and Repair Damage
Scrape away loose or flaking paint and prepare the remaining edges according to the coating manufacturer's instructions. Sanding may be appropriate for certain surfaces.
Older homes may contain lead-based paint. In the United States, homes built before 1978 can present a lead-paint hazard. Follow applicable EPA requirements and use qualified professionals when necessary rather than disturbing potentially hazardous paint yourself.
Replace damaged wood, repair appropriate cracks, and address rust on metal surfaces before continuing.
Step 4: Prime and Check the Weather
Apply a compatible exterior primer to bare areas and other surfaces that require priming. Use a product designed for the specific siding material.
Check the forecast before painting. Avoid unsuitable temperatures, rain, heavy dew, and conditions that prevent the coating from drying properly. Follow the manufacturer's instructions for application and recoat times.
Can You Use Interior Paint Outside or Exterior Paint Inside?
In general, interior paint should not be used on exterior surfaces because it is not designed to withstand prolonged weather exposure. It may deteriorate more quickly when exposed to sunlight, moisture, and temperature changes.
Exterior paint should also not be used indoors unless the manufacturer specifically approves it for interior applications. Products intended for outdoor use may have different emissions and application requirements.
The safest approach is to choose paint labeled for the intended location and surface. When in doubt, check the product's technical information or ask a qualified painting professional.
Frequently Asked Questions
Is exterior paint more durable than interior paint?
Exterior paint is designed to resist outdoor weather, while interior paint is formulated for indoor wear, cleaning, and appearance. Neither is universally more durable because each serves a different purpose.
Do interior and exterior painting require different primers?
Often, yes. Primer selection depends on the surface, its condition, and the type of paint being applied. Use a compatible primer designed for the intended application.
What is the best time to paint a home's exterior?
The best time is when temperatures and weather conditions fall within the paint manufacturer's recommended range. Dry conditions and suitable temperatures help paint adhere and cure properly.
Do walls always need primer before painting?
No. Previously painted walls in good condition may only need cleaning and minor repairs. Bare drywall, stains, damaged areas, and certain color changes may require primer.
Should I hire a professional painter?
A professional can be helpful for large projects, difficult-to-reach exterior areas, extensive surface repairs, or homes with potentially hazardous old paint. For smaller projects, homeowners may be able to handle the work with proper preparation and suitable materials.
Final Thoughts
Understanding interior painting vs. exterior painting helps you choose suitable products and prepare surfaces correctly. Interior painting focuses on appearance, cleanability, and performance in indoor environments, while exterior painting emphasizes weather resistance, adhesion, and long-term protection.
For either project, clean surfaces, repair damage, use the right primer when needed, and follow the manufacturer's application instructions. Taking time to prepare properly can help your paint finish look better, last longer, and protect your home more effectively.